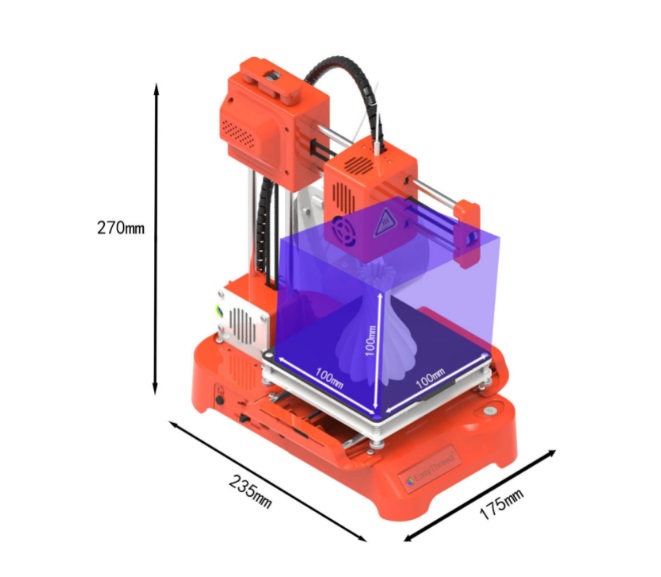
The Easythreed K7 mini 3D printer is a very small 3D printer.
What’s in the box?
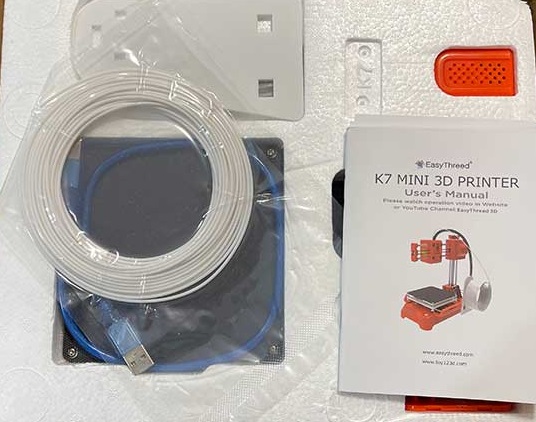
You will have to put together the printer but don’t worry because it’s quick and easy. There are just two main parts. There’s the base with the print bed and the nozzle mechanism which snaps into the base.
From there you just connect several small plugs and secure the nozzle mechanism with 4 screws.
Then you snap on the filament holder and you’re all set.
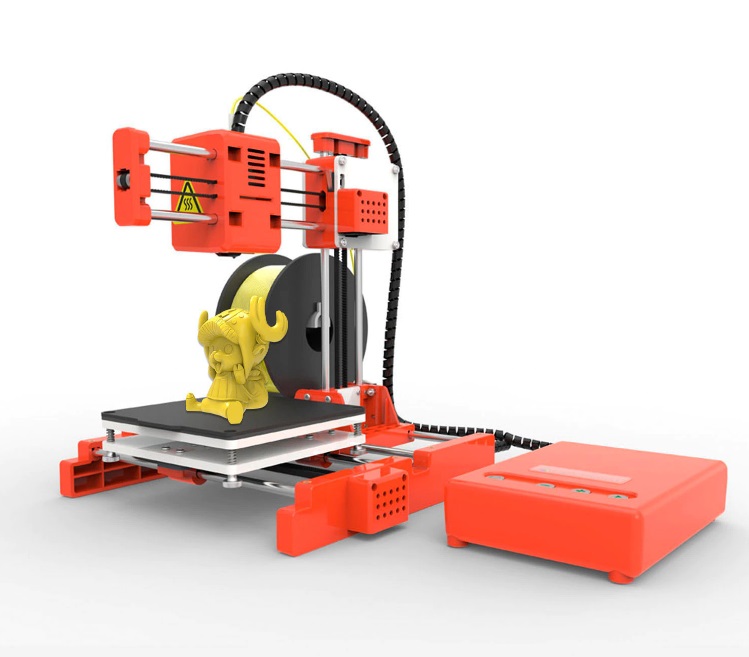
On the left side of the Easythreed K7 3D printer, you’ll find a Home button that moves the printing nozzle to the back left corner of the print bed. On this side of the printer, you will also find a microSD card slot, feed mode selector switch, USB host port, and power connector.
The opposite side of the K7 does not have any buttons or ports but the front of the printer has a Print/Pause button.
In order to turn the printer off, you have to yank out the power cord. Not exactly an elegant solution.
Before you can print your first 3D model, you will need to calibrate the printer. To do this, you use the four corner screws below the print bed to lower and raise the bed so that a sheet of paper can just fit between the print nozzle and print bed surface. You have to do this for all four corners.
A USB card reader with a microSD card is included with the Easythreed K7 3D printer. This card has manuals, instructional videos, slicing software, and 2 sample g-code 3D model files. G-code is the computer language that tells a 3D printer how to control the nozzle movement to print a 3D model.
The K7 3D printer can only print g-code files. If you want to print other 3D models and search the net for free models you’ll find a lot of STL files. STL stands for Standard Tessellation Language or STereoLithography. This type of file is in a format that describes the surface geometry of a 3D object.
To load the filament, you place it on the spool holder, feed one end of the filament into the printer, make sure the feed switch is set to FEED, and plug in the power cord. The printer nozzle will heat up and within a minute or so, and you’ll be able to start pushing the filament into the printer. When you see melted filament coming out of the nozzle above the print bed, you’re ready to start printing.
With a g-code file stored on the microSD card and the card inserted into the printer, you flip the feed switch to the center position and press the “play” button on the front of the printer. A minute or two later the printer will start printing.
The first thing it will do is print a “raft” which is a base for the print. When printing is finished, the nozzle will lift and you can remove the magnetic print bed and peel off the print. The raft breaks away from the bottom of the print revealing the 3D model.